STD Bus (IEEE 961) Computer
I acquired an old STD Bus computer system several years ago and pieced it into a working system with the following boards. The schematics are ones I made of the boards in an effort to figure out how they worked and how to configure them.
|
Quasitronics MB-2256A Z80 CPU Card (schematic) Shown with a 2K EEPROM at 0xF000 and a 1K RAM chip at 0xF800 (required for ISX.COM). |
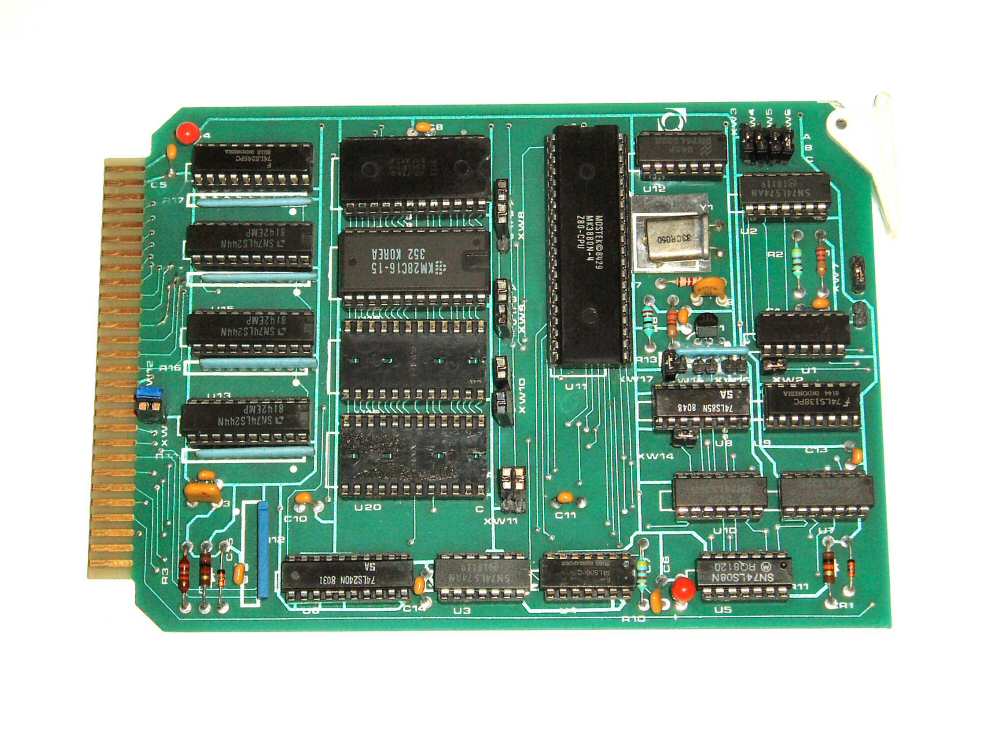
Quasitronics MB-2256A | |
|
Quasitronics 2277A 16K RAM Board Contrary to the sticker, this one is strapped for 0x0000. |
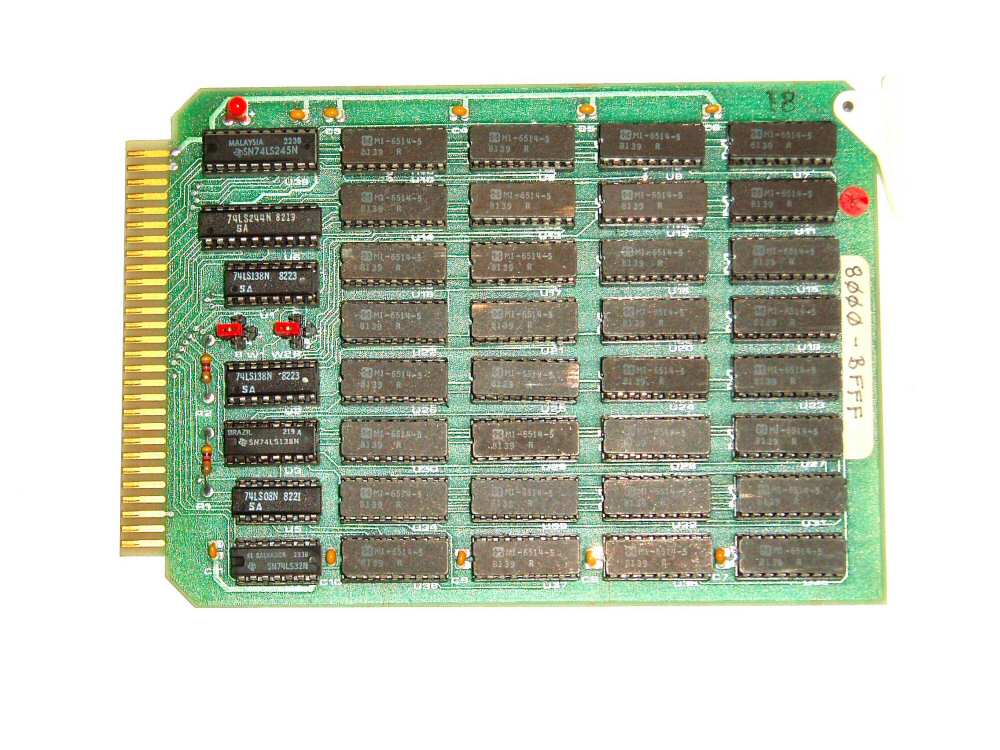
Quasitronics 2277A |
|
|
Three Quasitronics 2324C Memory Boards (schematic) They have 16K, 16K & 8K of RAM, respectively. Contrary to the sticker, this one is strapped for 0x8000. |
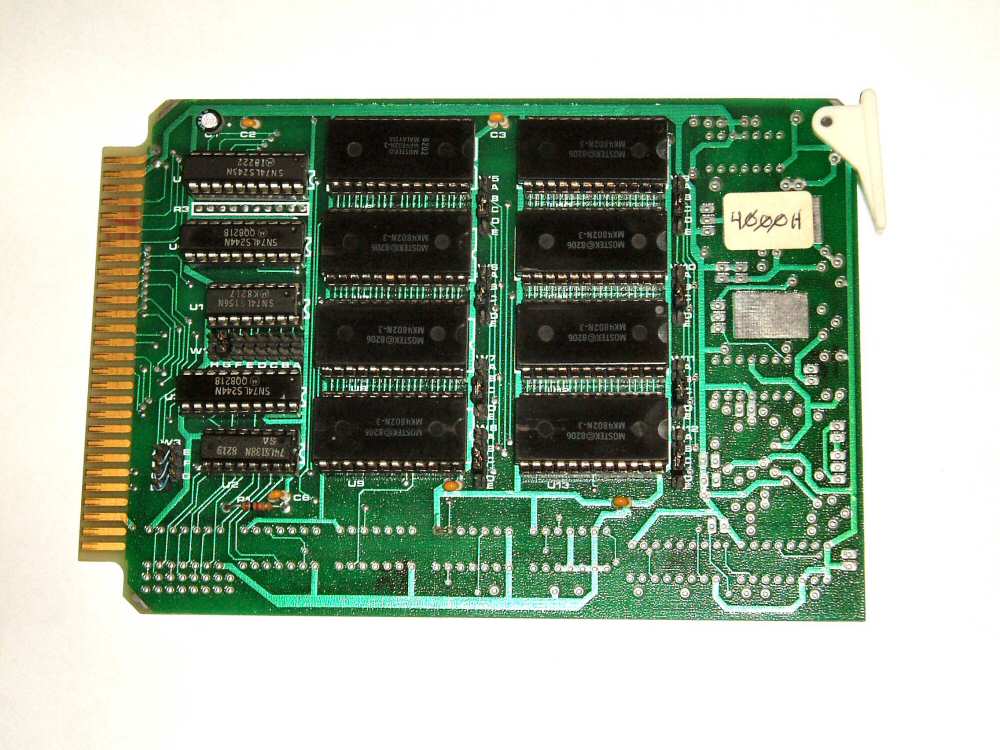
Quasitronics 2324C |
|
|
Two Quasitronics 2257B Serial/Parallel Boards This one is strapped for I/O ports 0x00-0x07. The switches are set for 9600 8N1. The blue DIP switch is on port A of the 8255 and I have the monitor referencing this to determine where the IDE controller is. In this case, the controller's I/O address 0x10. |
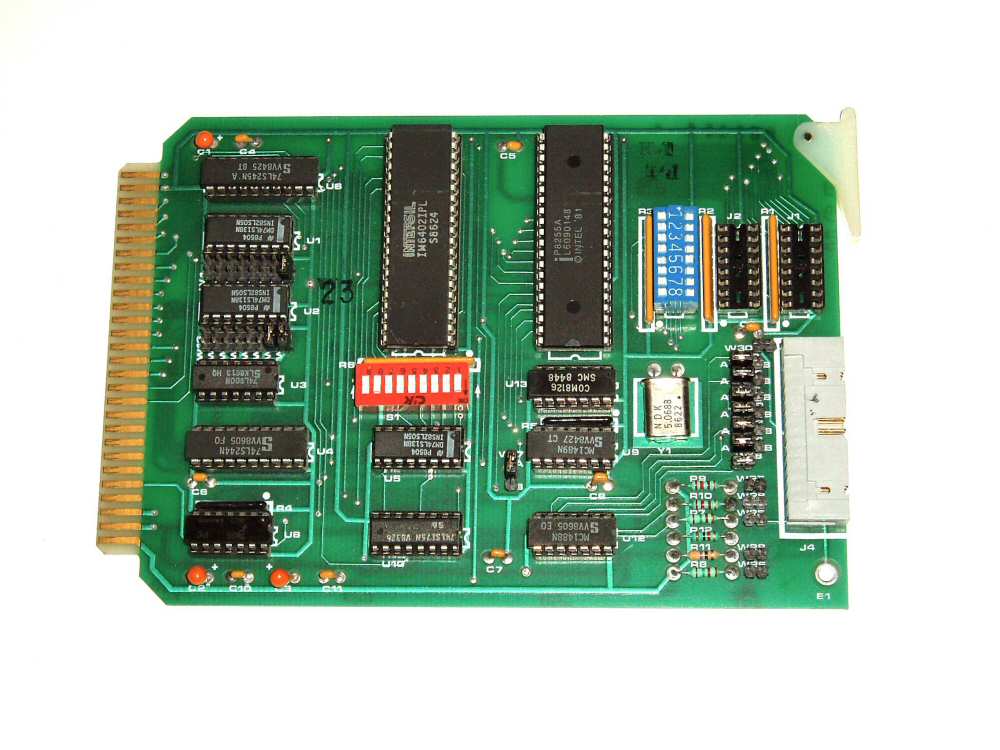
Quasitronics 2257B |
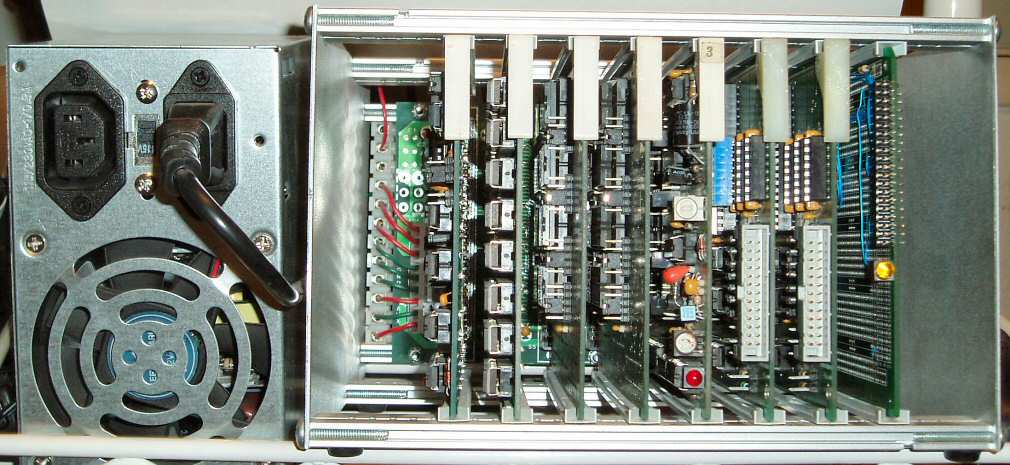
I picked up a better card cage and backplane by Vector Electronics for a few dollars, and wired an AT power supply to it. In the end I have a Z80 system with 56K of memory and a couple of serial ports.
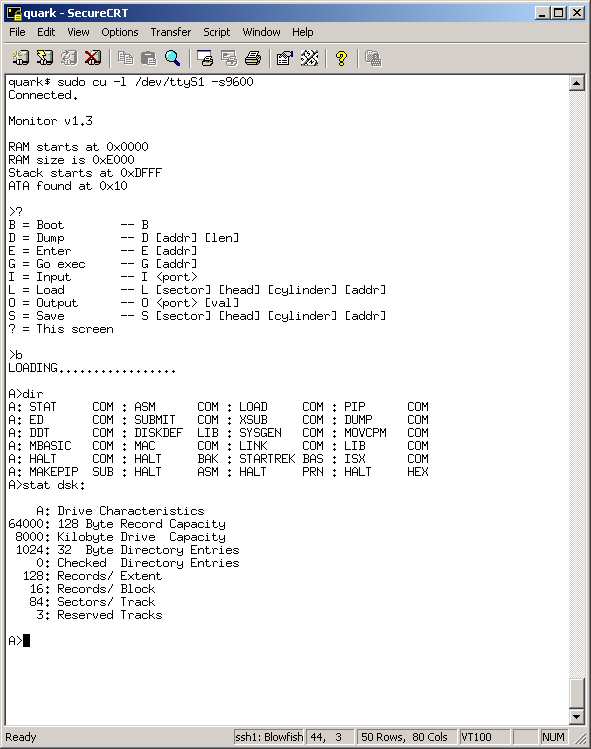
In order to get the system running, I needed to write a monitor. For development tools, I decided on the assembler packaged with SDCC, as-z80, and the linker link-z80. The monitor I wrote provided the ability to dump and edit memory, read and write I/O ports, execute code and load Intel HEX files. The monitor fits easily on a 2K EEPROM. The Intel HEX feature is partcularly valuable, in that Intel HEX format files can be simply sent to the console port and the monitor will convert and store the data in memory on-the-fly. I connect to the machine from my Linux box using the UUCP cu(1) program (yes, I am old-school) and doing an ASCII transfer via the ~> command. The monitor is currently able to process data on a 9600 bps connection from cu(1) without any data loss. At 9600 bps, however, the system does not have the horsepower to perform error checking on the Intel HEX records.
In order to make this system useful, it needed an operating system. The first to come to mind was CP/M.After a little research, I discovered that CP/M was available for free, including the original source code. The following sites were invaluable for obtaining CP/M software and documentation:
The Unofficial CP/M Web Site
Commercial CP/M Software Archive
Of course, one thing I was missing was some sort of mass storage device. I decided that an IDE interface would be the easiest to build and write software for.Once again, following sites were invaluable:
Wesley's PIC Pages: IDE Controller
Paul's 8051 Code Libarary, IDE Hard Drive Interface
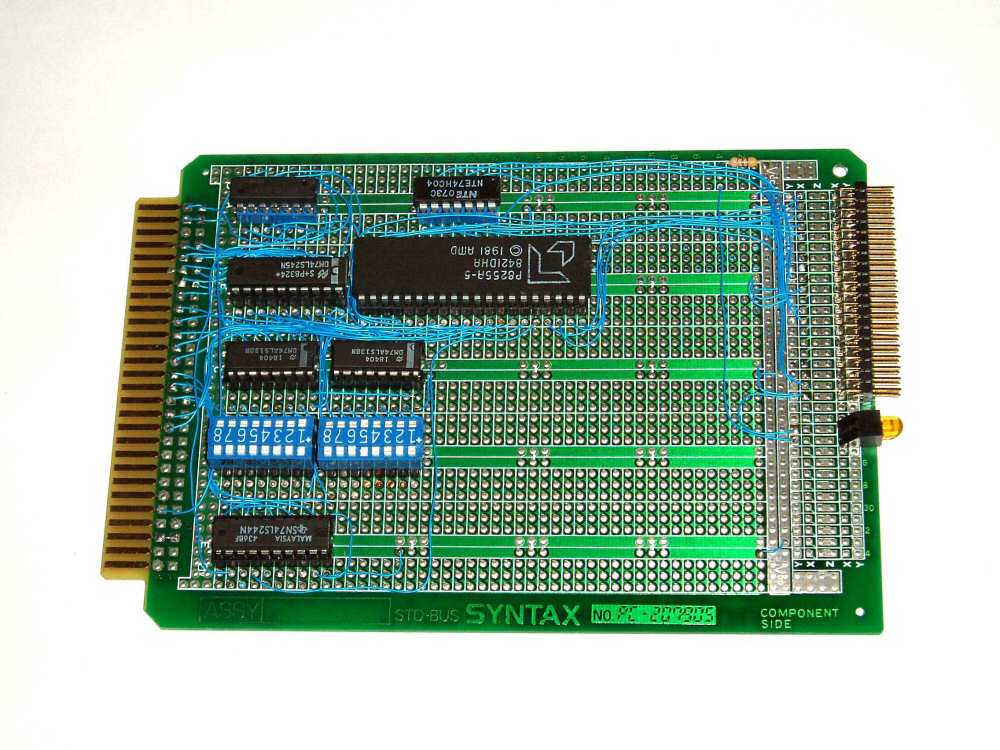
I had several 8255 chips laying around and some STD Bus prototype boards, so I wired together an implementation similar to Wesley's.I elected to place the IDE bus control signals on port C instead of port A, but while writing the firmware to interface with this board, I realized it would have been better to have left the control signals on port A.When originally writing the monitor, I elected to not hard-code the I/O addresses in the low-level I/O routines.This means when a low-level routine is called, it has to increment and decrement its way through the ports.Having the bus control signals on port A would have cut down on some of this.The IDE code was written using Paul's code as a guide, while referencing the ATA-1 specification.I updated the monitor to provide the ability to read and write any sector on the disk.The routines support the master and slave drives, CHS and LBA addressing.The IDE code has one oddity; I had trouble with the I/O write timing for the 8255.I ended up having to issue two consecutive OUT instructions for each I/O write in order to get it to take every time.Maybe someday I will dig around and figure this out.
Here is the schematic for the IDE interface, a copy of the ATA-1 spec and a photo of the board.The board is not pretty, but it has been reliable.The monitor's IDE routines have also been remarkably stable, too.
IDE
Schematic
ATA-1
Specification
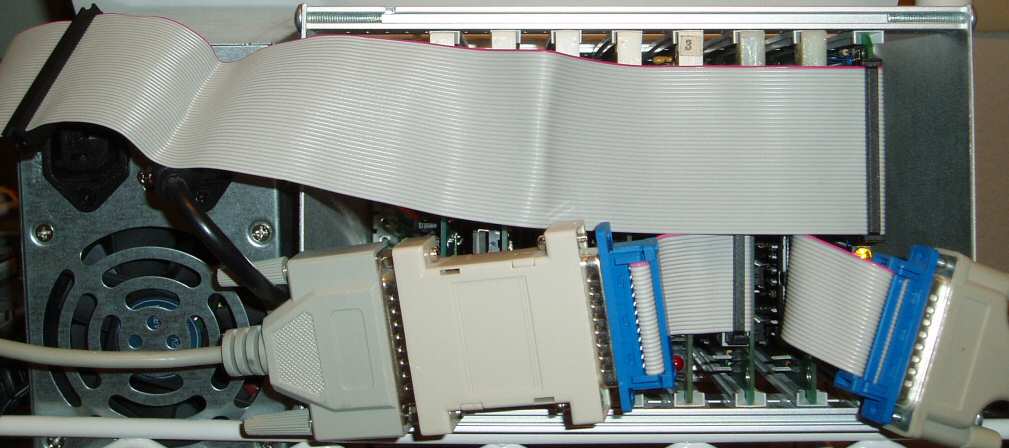
Here are a couple of pictures of the system and of the CF flash drive and
adapter.
Here is the latest source code for the monitor routines.It requires SDCC 2.6.0. I had originally started out with 2.6.0, then tried to upgrade to 2.7.0, because of a bug I found in the assembler.Unfortunately something changed with the linker, which rendered it inoperable with the current Makefile.I have not taken time to debug it and find out where the problem lies.
I was able to port CP/M 2.2 to this patform from the CP/M 2.2 ORIGINAL SOURCE package.The CBIOS.ASM file was, of course, rewritten and the DEBLOCKING.ASM code was included to convert the 512 byte IDE drive sectors to the 128 byte sectors CP/M uses.At the time, I did not realize David Klotzbach's ASM80 assembler existed. Therefore, I ported the OS2CCP.ASM and OS3BDOS.ASM files over to the as-z80 syntax.I added some additional comments to these while I was debugging the installation.I also added 3 new system calls to the BDOS -- punchst, readerst, and monitor as functions 41, 42 and 43, respectively.The punchst and readerst routines are to emulate the CP/M 3.0 AUX input status and AUX output status routines, so I can get Kermit ported, since my BIOS and monitor do not support the Intel IOBYTE.The BDOS monitor function (43) halts CP/M and drops the system into the ROM monitor.
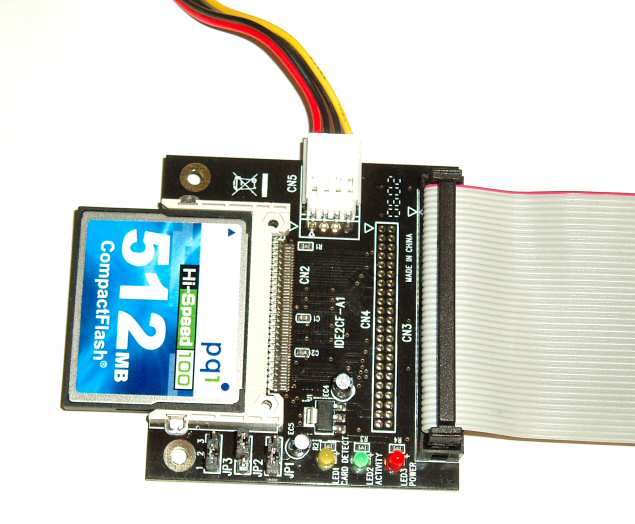
I decided on CompactFlash for the storage device and bought a CF to IDE interface.The CF card was one I had lying around and is 512MB in size.CompactFlash cards are required to support 8-bit transfers, so if I wanted to limit myself to CF storage, I wouldn't need the 8255. I could connect the card directly to the bus and only need I/O decode and buffering circuits.
Because of the size of today's drives, I elected to utilize the current partition table scheme.The partition type for CP/M is 0x52.I ran fdisk on the card from my Linux box, turned the DOS compatibility off, created a primary CP/M partition, and set it to be bootable.I also created 3 other logical CP/M partitions in an extended partion. Each partition is one cylinder in size, or about 8MB.
I created a boot loader that resides on the master boot record of the drive, and it is able to select the active CP/M partition and boot from it.The boot loader also contains a "boot saver" for writing the operating system to the reserved area of the drive.
In order to make the drives useable, I had to write a partition formatting (initialization) program.CP/M requires a volume's directory to be initialized before it can use it.The format program is a stand alone program that is loaded from the console and ran with the "G 100" command from the monitor.The program finds all of the CP/M partitions on the first IDE drive and lists them, along with their starting LBA and the number of sectors in the partition.You select which partition you want to format and it will build the directory entries.The DRM equate will need to be set to the same value as the DRM value in the BIOS.I used 1024 directory entries, which allows the average file size to be about 8K.The format program is pretty ugly, and I ran out of patience by the time I finished it.Someday, I plan to take the time to clean it up and better document it.
My CP/M BIOS routines use LBA mode, and I elected to hard-code the starting LBA of each partition in the BIOS.Calculating the LBA of the logical partions is not a trivial task and hard-coding eliminates the code needed for this.The starting LBA values entered in the BIOS are the same values provided by the format program.
CP/M 2.2 can, theoretically, support 1GB volumes, and up to 8192 directory entries.This means that the average file size would have to be at least 128K in order to utilize the entire volume.It also means the allocation vector table would consume 8K of memory. Each of my volumes are using 2K block sizes (the minimum, given the size of the volumes), so each allocation vector table consumes about 500 bytes of memory.
Here is the boot loader, CP/M and format program for this system:
These files require the memcfg.s file from the monitor.To install
CP/M:
1. Modify cbios.s and memcfg.s to match the system.
2. Make boot.ihx and cpm.ihx.
3. From the monitor, load the hard drive's Master Boot Record into memory
at 0x100 (L 1 0 0 100).
4. Copy boot.ihx to the console.
5. From the monitor, save the updated Master Boot Record (S 1 0 0 100).
6. Copy cpm.ihx to the console.
7. From the monitor, save CP/M to disk (G 200).
Now CP/M can be booted by using the monitor's boot command "B".CP/M
can also be started by running it from the monitor using "G" and the BIOS
cold start address.This is useful if you do not want to save CP/M
to disk, but want to boot it anyway.Keep in mind that CP/M reloads the
CCP and BDOS regularly from disk, which will overwrite the version in
memory.
Getting files onto the system is a little tedious.I have been converting the CP/M .COM files to Intel HEX format and loading them through the console.Because the monitor loads the MBR at location 0x100, I have been also loading CP/M from the console and manually cold starting it.Once it is up I just do a "SAVE n file.COM", where "n" is the number of 256 byte pages used by the file and "file.COM" is the filename, such as STAT.COM, PIP.COM, etc...Text files, such as assembler source files, that are less than about 28K are copied to the console with ED running in insert mode.The terminal emulator character delay settings will have to be adjusted in order for ED to keep up.Once it is finished, just do a "^Z" and "e" to end the session.
Here is a sample session.
So far, everything works, and I have gotten the ISIS-II interface running and a PL/M compiler working.My goal is to install the latest PL/M compiler and tools, then rebuild the entire system from the source files.Due to its size, bringing over the latest compiler is what sparked the desire to get Kermit working.With Kermit, I can eliminate doing the load, boot, then save sequence and just transfer the files across the punch & reader line.Kermit-80 is still availabe from Columbia University at http://www.columbia.edu/kermit/archive.html#cpm80. I finally got around to portng Kermit to the computer, which allowed files to be easily copied back and forth from my host machine.
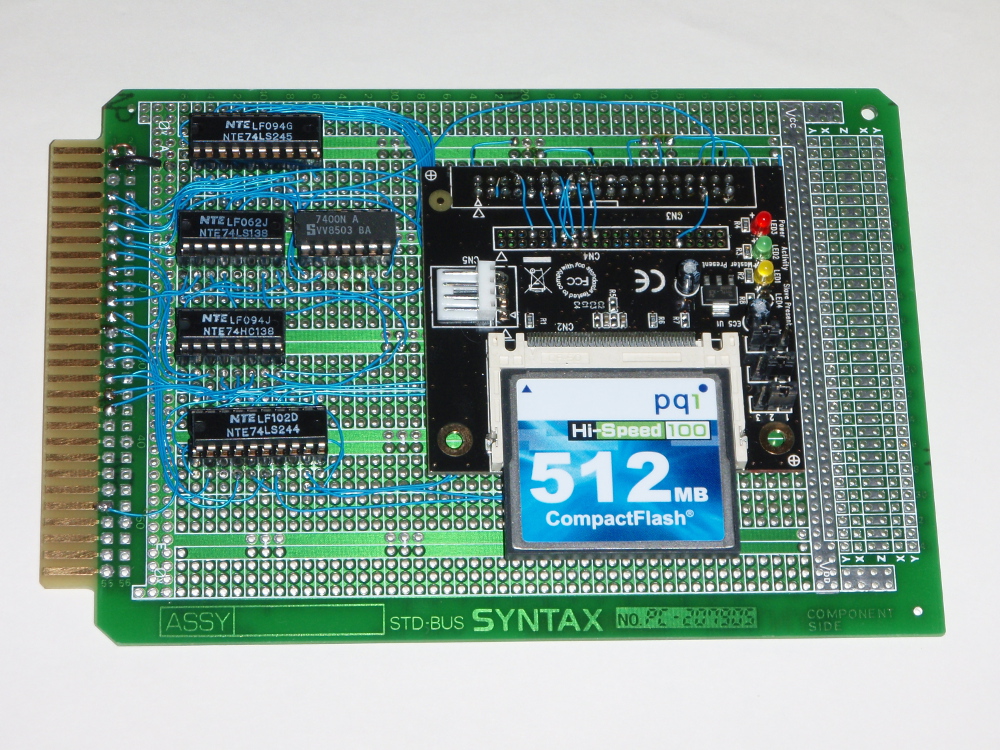
After running the system for a while, the IDE interface started generating errors and corrupting files.This wasn't entirely unexpected, as I wasn't happy with the interface, or the software I wrote for it, so I decided to start over and build and 8-bit interface for the CF adapter. I desoldered the 40-pin box header from the CF adapter, soldered new 40-pin header on the back side, then soldered the assembly to a prototype board. It required a 74LS244, a 74LS245, two 74LS138s and a 7400 to complete the logic.I re-wrote the IDE ROM routines and fixed some bugs in the dump utility.The IDE routines conform properly to the ATA protocol, provide good error handling and are three times faster than the old 16-bit routines.The 2.5 MHz CPU in the system now reads and writes data to and from the CF card at about 115KB/s.I also switched to Kent State University's ASxxxx cross assembler , which allows the use of macros and is less quirky than the SDCC package. The interface schematic and new ROM code are below.The schematic shows DIP switches for changing the I/O address of the board, but I decided to no install them, and hardwired the board instead.
Here's a photograph of the new board.
I also re-wrote the CP/M BIOS, and reconfigured the disk.I decided to leverage the DISKDEF.LIB routines to create equal sized partitions. I shuffled the disk work areas around to free up more usable memory, and simplified the track/sector to LBA conversion routine.The new BIOS and its global definition file is here:
The system now has sixteen 8 MB disks, for a total of 128 MB of space. This configuration provides a good trade-off between disk space and memory usage.
As a Linux user I found that cpmtools were a big help when working with disk images. Props to Michael Haardt for his hard work in creating this package. His tools make it easy to view directories and copy files from an image to the Linux filesystem. This makes it easy to manipulate individual files and upload them to via Kermit to the CP/M system.
When working with compressed disk images, the imd2raw.c routine, available from bitsavers, is required to decompress an image to a raw disk that cpmtools can work with. It compiles fine when issuing a "make imd2raw" from the same directory. It uses stdin and stdout to handle the files, so the form would be:
imd2raw < DISK.IMD > disk.raw
One of these days I may take the time to turn it into a proper Unix command, but it works for now.


