After some years of not
using the Plug-In, the 7S14 didn't work and I was very sad. What to
do?, first I thought the instrument is broken and printed out the
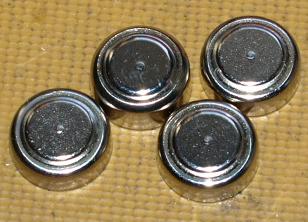
manual. Later I found that there are four small batteries inside, I
also read it in the TekScope yahoo forum. There are small 1.35 volts
mercury cells inside.
Something about batteries:
These type of batteries were often used as reference voltages in many
test equipment devices. For example also the Fluke
540B AC Standard
use this type of batteries as reference voltage or the
419A
DC Null Voltmeter. The batteries were often used in a ratio
measurement, this means it doesn't matter if the battery shows 1.2 volt
oder 1.45 volts. The only "must" the battery have to be stable during
the measurement itself.
The mercury cells having a long live time, less self discharge and good
power. Another very good thing is their discharge curve vs. lifetime
keeps very stable over a long period, this is very good for using as
reference. Mercury were used many times as reference voltage in older
photometers.
The only strong disadvantage is, they were no more selled in Europe, I
guess also in no more selled in the USA, this leds to the fact - no
more a high volume production of these cells anymore.
Which alternatives? Easiest is a 1.5V alkaline watch battery,
I choosed this type, because already in the house available, their
disadvantages are: less capacity, I guess a higher self discharge
curent (I don't know) and a much more worser discharge curve vs.
lifetime! the last is the worst disadvantage. But in the case of the
7S14 I didn't care. Other useful batteries are Wein cells oder Air-Zinc
batteries, which have a high power but their self discharge starts much
after activating.
Best alternative for a mercury cell would be Lithium battery with about
1,5 to 1,65 volts. These batteries having a very low self discharge vs.
storage time, even 15-20 years should not be a problem. They have a
wonderful high power and capacity and I guess also an excellent usefull
stable voltage over a long time. Some big famous companies manufactores
these Litium cells in the AAA-size micro package. Unfortunately an AAA
size is toooooo big, no space within the shielded area for the
batteries. This forced me using a standard watch battery.
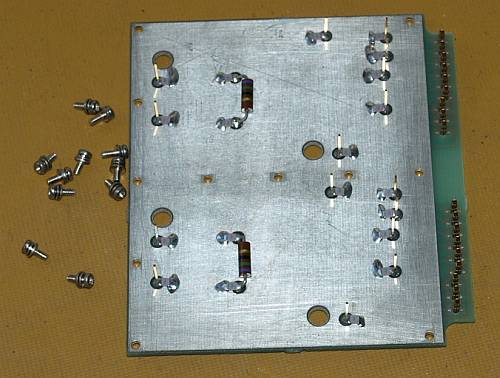
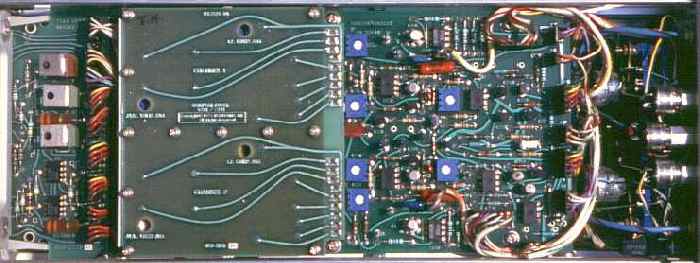
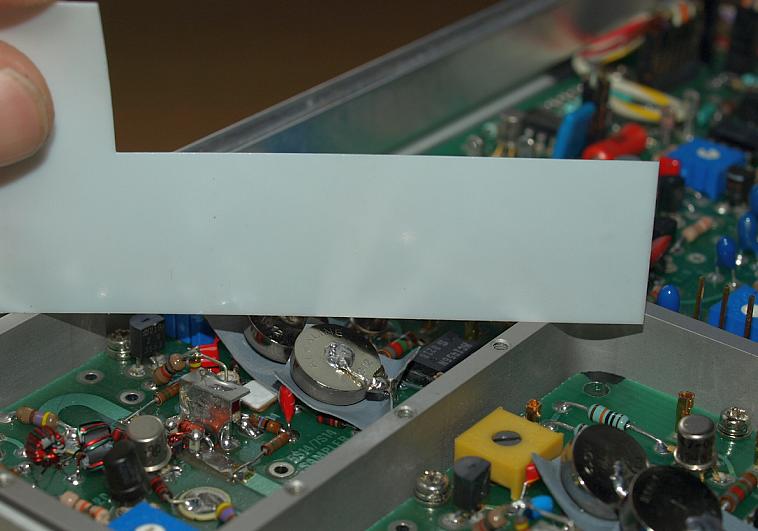
Remove this PCB reaching the batteries.
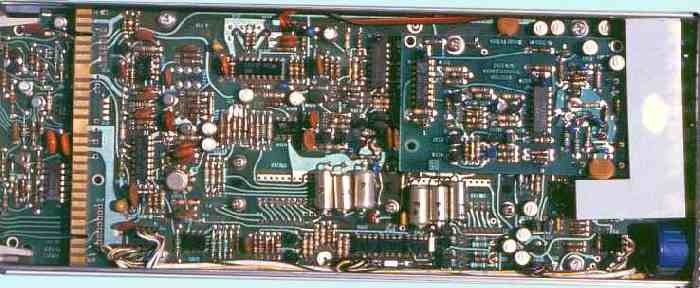
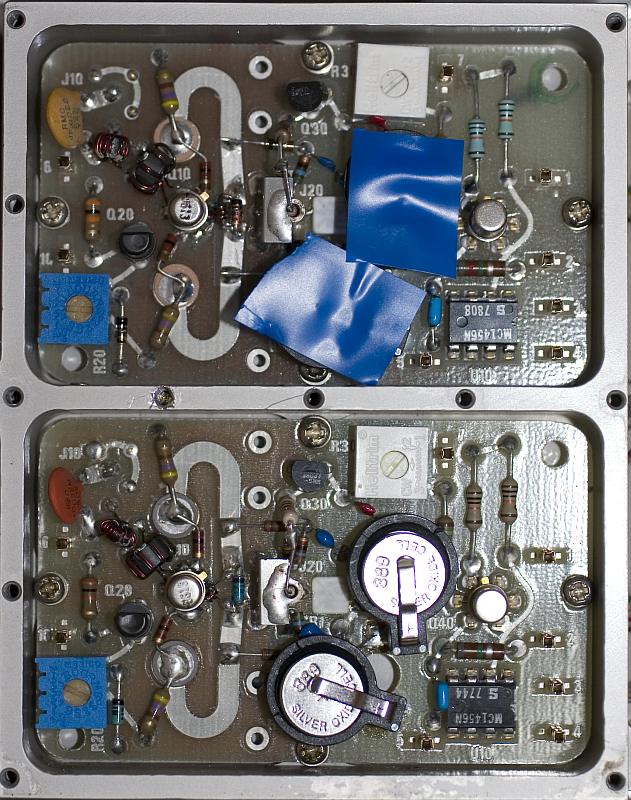
Photo shows the location of the four batteries, they were welded with
small stripes of metal and soldered on the PCB. The grey foil isolates
from a short-circuit.
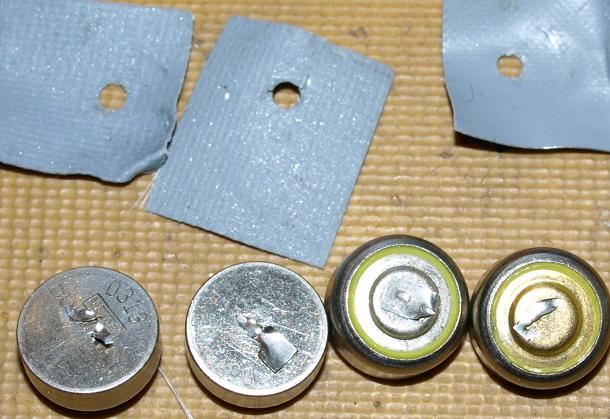
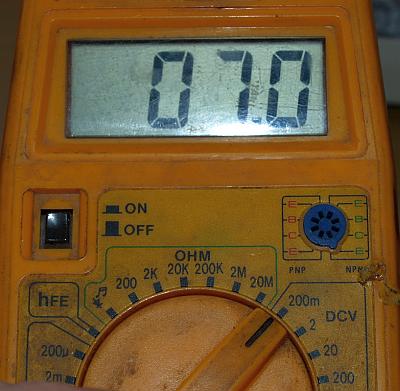
These are the empty original batteries. Only 7mV remain - these are really the nice faults and easy to find.
The new ones 1.5 volts. They came from a cheap warehouse, many of them for one Euro, I will see how long they are alive.
How to solder these batteries?
BOTH ARE SERIOUS TOXICALLY !!!
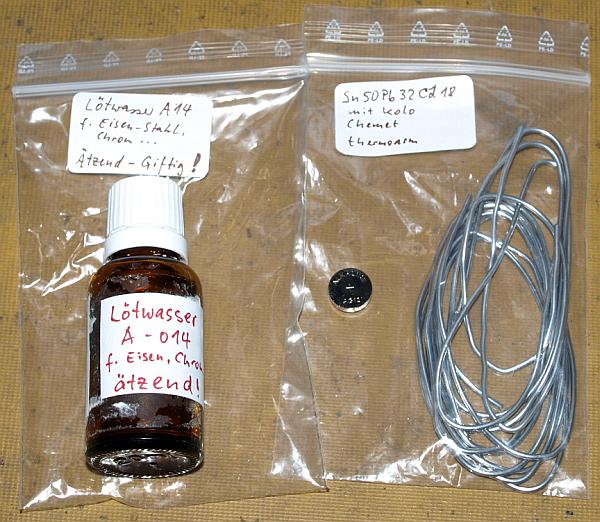
A nice friend knowing via Internet made one day such a gift.
Left - a strong flux-material which
can solder many metalls. Right - special solder wire with Sn
50%. Pb 32% and 18% Cadmium. This solder has a very low melting
point of approximately 145°C. This low melting point allows the use
of less solder-iron temperature and less heat transfered into the
batterie. Much heat should be avoided, it can destroy the gasket of the
battery very fast and I also don't what happens inside the batterie if
using excessive heat. This solder will be used normally for high
precision DC metrology instruments (me too) or inductive soldering
machines, if heat should be minimized. If you don't like Cd
solder-wires, nowadays there are many solder-wires available with low
melting points, many without the very poisonous Cd. Other low melting
point examples containing Indium or Bismuth. Try a web search for
"Indium", you will find a company close to that name with huge
unbelievable number of solder wires types. About the sample
prices you will start thinking. I used the one I had in the house just
at the moment. Using standard Sn Pb Cu solder wire it's getting
risky for the batteries. May be soldering at all will destroy the
batteries, I don't know - but I also don't care - it works or it don't
works and if they are empty next week - bad luck.
Use always protection eye classes for soldering a batterie, if the
gasket explode caused by the heat, you never know which kind of acidly
materials coming out of the batterie?, may be direct in your eyes.
Don't trink that flux, wash your fingers after work, don't eat
your lunch during soldering, be carefull with the Cd solder wire and
don't sit in the smoke during soldering!!!, blow the smoke away by a
fan or do it outside.
In my house I can solder with
whatever I want. Before soldering the batteries the surface should be
scratched with a sharp metal tool or a sandpaper, it increase the
micro-surface for a better solder junction. Unfortunately the original
batteries are no more available, this force such solutions saving
the life of a worthwhile 7S14 Plug-In.
For soldering I recommend a big solder iron, transfering within a short
time a lot of heat to the solderpoint, don't solder longer than
necessary!
After replacing, measure the distance between anode of the batterie
and ground signal of the PCB on top, preventing a short-circuit.
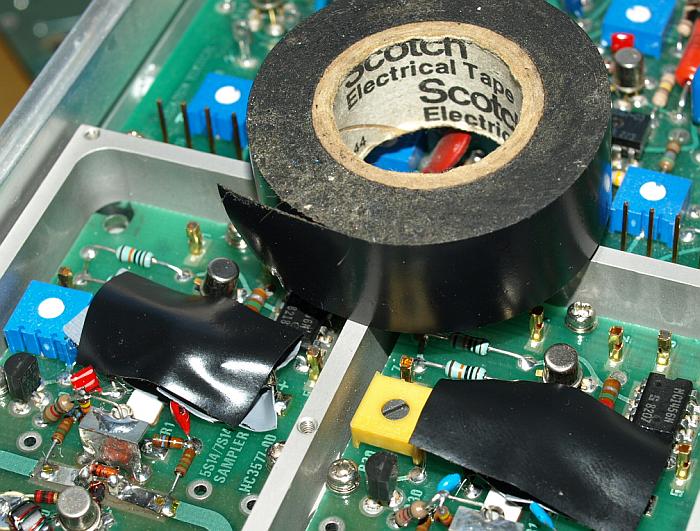
Isolate the batterie with a tape against the top PCB.
Instrument works again
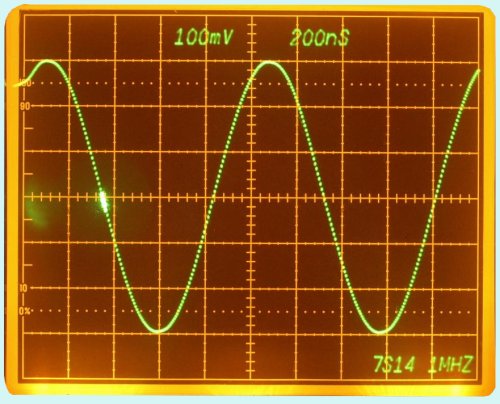
300mV 1MHz sine wave singal, yeah it works again, displayed on a
7904. Dots appearing because "Hold" button is activated.
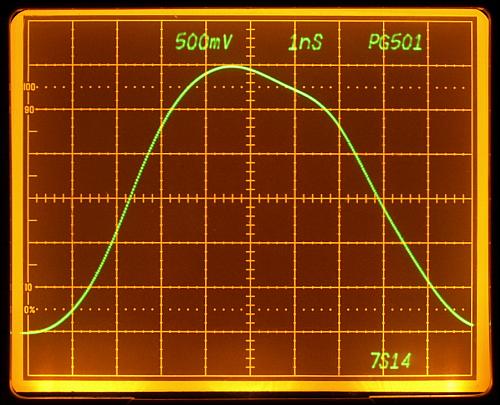
Taken from
PG501 Pulsgenerator
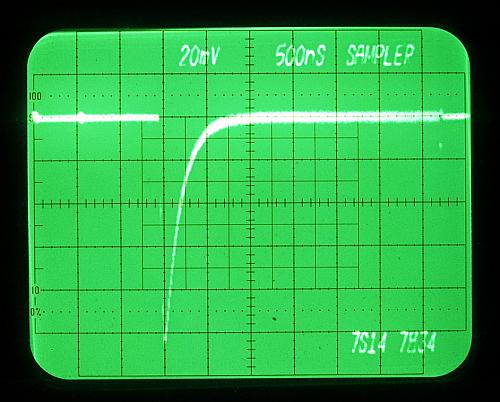
This signal is measured on a
7834 fast storage oscilloscope together with the 7S14.
A storage oscilloscope is a nice
mainframe for a sampling Plug-In. With the variable
persistance, low repetition and lower frequency signals getting
easy observable. For higher frequencies shows any 7000 series mainframe
good results. The Plug-In use one vertical and one horizontal slot.